Easy Terracotta Pot Painting Ideas: Step-by-Step
Painting terracotta pots is a fantastic way to breathe new life into your plant collection, and banish those dull, uninspiring brown containers cluttering your shelves. Are you tired of the same old look, maybe with a few chips and scuffs showing their age? I know I was! Imagine a row of vibrant, stylish pots reflecting your personal taste, turning your leafy friends into true statement pieces. This quick and affordable DIY project can transform your space for less than $20 and in just an afternoon. In this article, I’ll walk you through everything you need to know, from prepping your pots to achieving a flawless finish that will make your plants pop. Get ready to unleash your creativity and give your greenery the beautiful home it deserves!
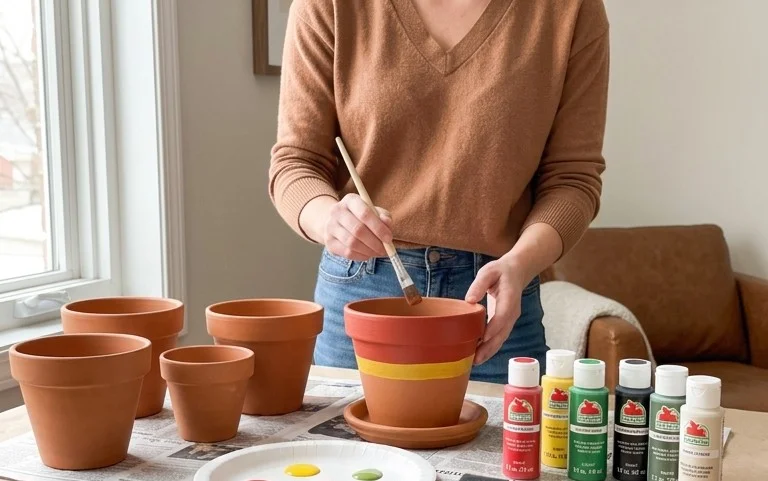
Give Your Greenery a Glow-Up: How to Paint Terracotta Pots Step-by-Step
There’s something undeniably charming about terracotta pots. Their earthy hue and porous nature feel like a natural extension of the plants they house. But let’s be honest, a row of identical, unpainted terracotta can sometimes feel a little… well, plain. That’s where a splash of paint comes in. Painting your terracotta pots is an incredibly accessible and rewarding DIY project that can completely transform your plant display, breathing new life into your home decor. Whether you’re looking for a vibrant pop of colour, a sophisticated neutral, or a fun pattern, this guide will walk you through everything you need to know to paint your terracotta pots like a pro.
I’ve been playing around with painted terracotta for years, from a boho-chic vibe on my balcony to a minimalist monochrome look in my living room. It’s a fantastic way to personalize your space, especially if you’re renting and can’t drill holes for shelves or hang plants. Plus, it’s a relatively inexpensive project that delivers a big impact. So, let’s get started!
What You’ll Need and Roughly What It Costs
The beauty of painting terracotta pots is that you don’t need a huge investment to achieve stunning results. Here’s a breakdown of what you’ll want to gather, with approximate costs. Prices are based on general retail in the UK and can vary depending on your location and chosen brands.
- Terracotta Pots: The star of the show! Prices can range from £1.50 for a small 10cm pot to £10+ for a large 30cm pot. For this project, let’s assume you’re buying 3 medium-sized pots (around 15-20cm diameter) at an average of £3 each, so £9 total.
- Primer: Essential for good adhesion and a smooth finish. A small can of multi-surface primer (around 250ml) will cost approximately £5-£8.
- Paint: This is where you can have fun! Acrylic craft paints are widely available and work wonderfully. For a few pots, you might need 2-3 colours. A 50ml bottle of good quality acrylic paint can cost around £2-£4. So, for three colours, budget £6-£12. If you’re opting for spray paint, a can might be £5-£10, and you might need 1-2 cans depending on the coverage.
- Brushes: A set of assorted acrylic brushes (a few flat, a few round) is ideal. You can find a decent set for £5-£10.
- Sealant/Varnish (Optional but Recommended): To protect your paintwork, especially if the pots will be outdoors or handled frequently. A small bottle of clear acrylic varnish (matte or gloss) is usually £5-£8.
- Drop Cloth or Newspaper: To protect your workspace. Old newspapers are free, or a plastic drop cloth can be bought for £2-£4.
- Gloves (Optional): To keep your hands clean. A pair of disposable gloves costs around £1.
- Sanding Paper (Fine Grit): To prep the surface of the pot. A small pack of fine-grit sandpaper (around 180-240 grit) is about £2-£3.
So, for a project involving 3 medium pots with acrylic paints and sealant, you’re looking at a total estimated cost of approximately £27-£44. This is a fantastic price for such a transformative DIY!
Measure and Plan Before You Start
Before you even think about picking up a paintbrush, take a moment to plan. This doesn’t need to be complicated, but it will save you time and prevent those “oops” moments.
- Consider Your Space: Where will these pots live? Are they indoors or outdoors? This will influence your paint and sealant choices (more on that later). If they’re going in a small apartment, you might want to choose colours that complement your existing decor and don’t overwhelm the space. Think about the light levels too – brighter colours can really liven up a dim corner.
- Choose Your Colours: This is the fun part! Do you want a cohesive look with a limited palette, or a vibrant mix of complementary colours? Consider the colours of your plants. Do you want to contrast with the foliage, or blend in? For a modern look, consider a monochrome scheme (different shades of grey, black, or white). For a more bohemian feel, think earthy tones, jewel tones, or even a pop of mustard yellow or teal.
- Design Ideas: Will it be a solid colour? Stripes? Polka dots? A gradient effect? If you’re new to this, starting with a single solid colour is the easiest way to begin. For a bit more flair, simple stripes or dots are achievable even for beginners.
- Pot Size and Placement: Think about the plants you intend to put in these pots. A large, dramatic plant might suit a bold, statement pot, while a cluster of small succulents could look lovely in mini painted pots.
Your Step-by-Step Guide to Painting Terracotta Pots
Ready to get messy? Here’s the straightforward process to transform your terracotta.
Step 1: Prepare Your Pots
This is crucial for paint to adhere properly. Ensure your pots are completely dry – terracotta is porous and holds moisture. If they’re new, you might want to give them a quick wipe down with a damp cloth to remove any dust. If you’re repainting old pots, scrub off any old paint or dirt. Then, using your fine-grit sandpaper, lightly sand the entire outer surface of the pot. This creates a slightly rough texture for the primer to grip onto. Don’t go crazy; a gentle scuff is all you need. Wipe away any dust with a dry cloth.
Step 2: Apply Primer
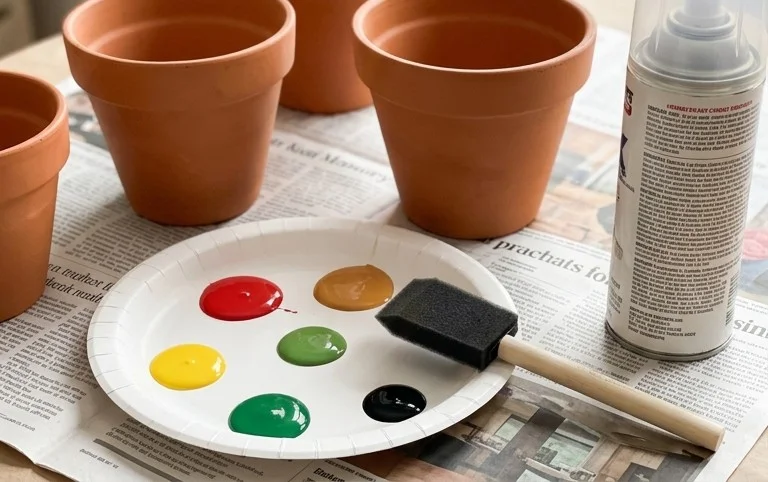
Lay down your drop cloth or newspaper to protect your surface. Apply a thin, even coat of your chosen primer to the outside of the pot. You can use a brush or, for a smoother finish, spray primer works well. Make sure to get into any nooks and crannies. Let the first coat dry completely according to the product’s instructions (usually 30-60 minutes). Once dry, apply a second thin coat of primer for good measure. Proper priming is key to preventing the terracotta from “blooming” (where moisture seeps through the paint and causes white marks) later on.
Step 3: Paint Your Pots
Once the primer is thoroughly dry, it’s time for the fun part – painting! If you’re using acrylic paints, apply your first colour in thin, even coats. Avoid overloading your brush, as this can lead to drips. Allow each coat to dry completely before applying the next. Depending on the opacity of your paint and the colour you’re using, you might need 2-3 coats for full coverage. If you’re painting a pattern like stripes or dots, ensure the base colour is fully dry before adding your next design element.
If you’re using spray paint, work in a well-ventilated area (ideally outdoors) and wear a mask. Hold the can about 20-30cm away from the pot and spray in light, sweeping motions. Apply multiple thin coats rather than one thick one to avoid drips. Allow each coat to dry before applying the next.
Step 4: Add Details (Optional)
If you’re going for a more intricate design, now’s the time to add those details. Use smaller brushes for finer lines, dots, or stencils. Remember to let each layer of paint dry completely before moving on to the next to prevent smudging.
Step 5: Seal Your Pots
This step is optional but highly recommended, especially if your pots will be exposed to moisture or handled frequently. Once your paint is completely dry (give it at least 24 hours to be safe), apply 1-2 thin coats of your clear acrylic varnish or sealant. This will protect the paintwork from chipping, fading, and moisture damage. Again, allow each coat to dry thoroughly according to the product instructions.
Styling Notes: Making Them Look Terrific
Painting your pots is just the first step; making them look fantastic once they’re in use is where the real magic happens!
- Colour Harmony: If you’ve opted for a bold colour, consider how it will interact with the plant’s foliage and your room’s existing colour scheme. A bright coral pot can bring a vibrant pop to a room with neutral tones, while a deep forest green pot can create a lush, calming effect.
- Texture Play: Don’t be afraid to mix textures. A sleek, matte painted pot can look stunning next to a rougher, natural-looking plant. Alternatively, a high-gloss pot can add a touch of glamour to your greenery.
- Placement is Key: Grouping pots of varying sizes and heights can create visual interest. Place taller plants in taller pots and shorter plants in smaller ones, or create a striking display by offsetting heights. Consider the light source – plants that need bright light should be placed near windows, and your beautifully painted pots will enhance their surroundings.
- Beyond the Basics: Think about what you put *in* the pots. For renters, a lovely painted terracotta pot can hold a faux plant beautifully. For real plants, consider the drainage needs – if your painted pots don’t have drainage holes, use them as decorative cachepots and keep your plants in their plastic nursery pots, which you can then remove for watering.
Keeping It Tidy After Week One
After the initial excitement of your newly painted pots, keeping them looking pristine is simple:
- Dusting: A soft duster or a dry microfiber cloth will be your best friend. Gently wipe down the pots regularly to prevent dust build-up, especially if they are near windows or on shelves.
- Wipe Down Spills: If any water splashes onto the pots during watering, give them a quick wipe with a damp cloth. While your sealant will offer protection, it’s always good practice to address moisture promptly.
- Avoid Harsh Cleaners: For general cleaning, mild soap and water are sufficient. Avoid abrasive cleaners or harsh chemicals, which can damage the paintwork over time.
Mistakes That Make This Fail
Even the simplest DIY projects can go awry if you skip crucial steps. Here are the common pitfalls to avoid:
- Skipping the Primer: This is the biggest mistake! Without primer, paint is more likely to chip, peel, or bleed through, especially on the porous surface of terracotta. You’ll end up with a streaky, unprofessional finish.
- Not Sanding: While terracotta is porous, a light sanding creates the optimal surface for paint adhesion. Skipping this step can lead to paint not sticking as well as it should.
- Painting Damp Pots: Terracotta holds moisture. If you paint over a damp pot, the trapped moisture will eventually push the paint off, causing blistering and peeling. Always ensure your pots are bone dry before you start.
- Applying Paint Too Thickly: Thick coats of paint are more prone to drips, uneven coverage, and longer drying times. Always opt for multiple thin coats.
- Not Sealing (for outdoor use): If your painted pots are going outside, skipping the sealant is a recipe for disaster. Rain, sun, and temperature changes will quickly degrade unprotected paint.
- Rushing the Drying Process: Patience is key! Trying to apply a second coat before the first has fully dried will lead to smudging and a messy finish. Always allow adequate drying time between coats.
Painting terracotta pots is a wonderfully rewarding project that adds personality and style to your home. With a little preparation, the right materials, and a touch of creativity, you can transform plain pots into works of art. So, grab your brushes, unleash your inner artist, and get ready to give your plants the stunning homes they deserve!
Conclusion
Transforming plain terracotta pots into beautiful, personalized pieces is a surprisingly simple joy that can brighten your everyday living space. Imagine the subtle lift of seeing your vibrant, painted terracotta pots nestled amongst your greenery, bringing a pop of color and handcrafted charm to your windowsills or patio. It’s a small change that makes a delightful difference to your surroundings.
Ready to get started? Your smallest first step today could be as easy as gathering a few pots and choosing your favorite color. For a different feel, consider a monochromatic palette for a minimalist living room, or use brighter, bolder hues for a playful splash in a child’s room. The possibilities are endless!
We hope this guide inspires you to embark on your own terracotta painting adventure. Don’t stop here; explore our site for even more creative home decor and organization ideas!
