Easy DIY Halloween Tree Porch Decor: Budget Ideas
DIY Halloween Tree Porch Decor is the perfect way to banish that empty, uninspired porch look and embrace the spooky season without breaking the bank. Tired of your entryway feeling… well, a little lackluster when Halloween rolls around, or worried about spending a fortune on store-bought decorations? I get it! This easy, budget-friendly project transforms a simple tree into a charmingly eerie focal point. Imagine your guests being greeted by a whimsical Halloween tree, adorned with glowing mini pumpkins, playful ghosts, and spooky spiderwebs, all for roughly the cost of a few bags of candy and completed in under an hour!
In this guide, I’ll walk you through exactly how to create this delightful display. We’ll cover simple crafting techniques, smart shopping tips for affordable materials, and creative ways to personalize your spooky tree to perfectly match your home’s vibe. Let’s make your porch the star of the neighborhood this Halloween!
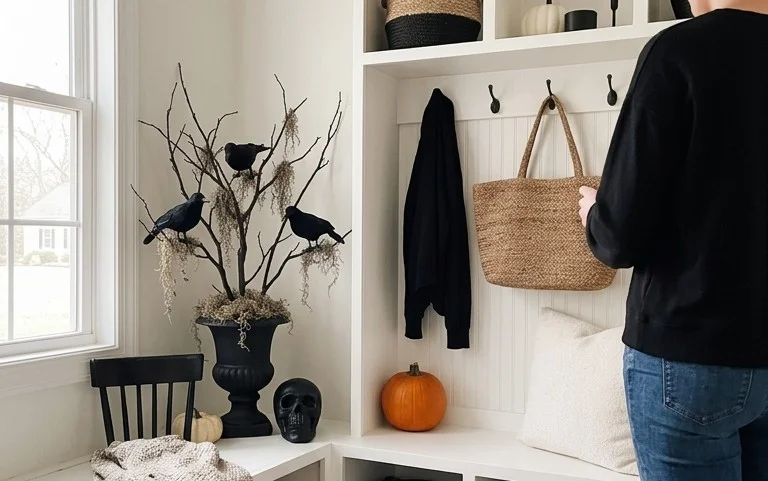
Welcome to your guide to creating a show-stopping DIY Halloween Tree for your porch! This project is all about embracing the spooky season without breaking the bank or requiring a master craftsman’s touch. We’re going to transform a simple tree into a bewitching centerpiece that will delight trick-or-treaters and add a touch of Halloween magic to your home.
Creating Your Spooktacular DIY Halloween Tree
As the leaves turn golden and the air gets a little crisper, my mind immediately jumps to Halloween! I love the thrill of dressing up, carving pumpkins, and, of course, decorating. This year, I wanted to create a focal point for my porch that was both impressive and achievable. That’s where the idea for a DIY Halloween Tree came in. It’s a fantastic way to bring the festive spirit right to your doorstep, and the best part? It’s completely customizable and budget-friendly. Let’s get started on making your porch the most spirited on the block!
Gathering Your Hauntingly Good Supplies
The beauty of this project is its flexibility. You can scavenge, repurpose, and find amazing deals to keep costs down. Here’s a breakdown of what you’ll likely need, with rough cost estimates. Remember, these are just guidelines – your actual costs will vary depending on where you shop and what you already own.
- The Tree: For this project, I recommend a tall, slender artificial tree. Think around 6-7 feet (1.8-2.1 meters) in height. You can often find these on sale after the holiday season or at discount stores for around $30-$60. Alternatively, a large, bare branch secured in a sturdy base can also work beautifully and be virtually free if you find one yourself.
- Tree Stand/Base: If your artificial tree doesn’t come with a stand, you’ll need one. A simple metal stand can cost about $15-$25. For a natural branch, you’ll need something heavy to secure it. A large planter pot filled with sand or gravel, or even a sturdy bucket, can work. A large planter can be around $20-$40, and a bag of sand or gravel is about $5-$10.
- Halloween Ornaments: This is where the fun really begins! Aim for a good mix of sizes and textures. Think miniature pumpkins (plastic or foam, about $1-$2 each), plastic spiders and bats (packs of 12-20 can be $5-$10), small skulls (packs of 6-10 for $8-$15), tinsel or plastic ribbon in black, orange, purple, or green ($3-$8 per roll), and maybe some DIY ornaments like painted pinecones or felt cutouts. For a 6-7 foot tree, you’ll likely need at least 30-50 ornaments, depending on their size.
- Fairy Lights (Optional but Recommended): Orange or purple LED fairy lights add an ethereal glow. A strand of 50-100 lights can cost $10-$20.
- Spooky Accents: Consider some larger pieces to anchor the theme. A few faux cobwebs ($3-$5 per pack), a plastic skeleton arm or two ($5-$10 each), or even a small fog machine ($30-$50 if you want to go all out) can elevate the display.
- Tools: Scissors, a measuring tape, and possibly a drill if you’re securing a natural branch to a permanent base (though we’ll cover no-drill options too!).
Roughly, you can expect to spend anywhere from $70 to $150 for a comprehensive setup, but this can be significantly reduced by using items you already have or by finding great clearance deals.
Measuring and Planning Your Porch Persona
Before you even buy a single glittery skull, take a moment to assess your space.
- Measure Your Porch: How much width and depth do you have to work with? You don’t want your tree to overwhelm the space or be so small it gets lost. Measure the area where you envision the tree standing. For a typical front porch, a 3-foot (0.9 meter) diameter clearance around the tree is usually sufficient.
- Consider Traffic Flow: Ensure your tree won’t obstruct the main path to your door. You want it to be seen, not be a tripping hazard.
- Think About Visibility: Where will your tree be seen from most? From the street? From your living room window? This might influence how you decorate the back or sides.
- Visualize the Vibe: Do you want it to be subtly spooky, truly terrifying, or more whimsical and fun? This will guide your ornament choices and colour palette. For a classic Halloween look, stick to black, orange, purple, and green.
Sketching a quick diagram of your porch and where you imagine the tree and any accompanying decor can be incredibly helpful. It’s like a blueprint for your Halloween masterpiece!
The Step-by-Step Spooky Transformation
Now, let’s get down to the fun part – building your tree!
- Prepare Your Base: If using an artificial tree, assemble its stand. Ensure it’s stable and level. If you’re using a natural branch, secure it firmly in your chosen container. For a no-drill rental option, a very wide and heavy planter with the branch nestled deep inside, possibly with some extra weights like large rocks at the bottom, is your best bet. Make sure it’s undeniably stable.
- Erect the Tree/Branch: Carefully place your tree or branch in its stand. Adjust any branches on an artificial tree to achieve your desired fullness. For a natural branch, ensure it’s positioned as upright and stable as possible.
- String the Lights (If Using): Starting from the bottom and working your way up, wrap your fairy lights around the tree. Aim for even distribution. Tuck the battery pack or plug discreetly at the base or behind the trunk.
- Add Your Largest Ornaments First: These will act as anchor points. Hang your miniature pumpkins, larger skulls, or clusters of spooky baubles. Space them out evenly across the tree.
- Fill in with Mid-Sized Ornaments: Now, add your plastic spiders, bats, and smaller skulls. Don’t be afraid to hang them at different heights and angles. Let some bats dangle, and have spiders seemingly crawling up the branches.
- Incorporate Ribbon and Tinsel: Drape black, orange, or purple ribbon or tinsel around the tree. You can weave it through the branches, tie bows, or let it hang loosely. This adds texture and visual interest.
- Hang Your Smallest/DIY Ornaments: These are great for filling in any gaps. If you have painted pinecones or felt cutouts, distribute them throughout the tree.
- Add the Finishing Spooky Touches: Drape faux cobwebs around the base of the tree, or even lightly over some branches. If you have a skeleton arm, position it as if it’s emerging from the branches.
This process should take about 1-2 hours, depending on the complexity of your ornament collection.
Adapting for Smaller Spaces and Rentals
Worried about space or those pesky landlord rules? No problem!
- Small Space Solution: Opt for a smaller artificial tree, perhaps 3-4 feet (0.9-1.2 meters) tall, or even a large potted plant that you can decorate. You can also create a “tree” by attaching branches to a wall or fence using command strips, or by stacking painted cardboard boxes in a conical shape. The key is to scale down the tree and the ornaments.
- Rental-Friendly No-Drill Approach: As mentioned, a heavy, wide base is crucial for natural branches. For artificial trees, ensure the stand is robust. Instead of drilling into your porch, use strong adhesive hooks (like heavy-duty command hooks) to attach lights or lighter ornaments to overhangs or railings. You can also lean a branch against a wall and secure it with heavy-duty rope tied to a sturdy railing or post, ensuring it’s still stable and safe. Another idea is to create a flat wall display using a large pegboard or a piece of plywood painted black, onto which you can attach all your Halloween elements.
Styling Notes: Colour, Texture, and Placement
Once your tree is assembled, it’s time to make it truly shine with thoughtful styling.
- Colour Palette: Stick to a cohesive colour scheme. Classic Halloween colours like black, orange, and purple are always a winner. You can also introduce pops of green, lime green, or even a deep, moody blue. Ensure your ornaments complement each other.
- Texture is Key: Mix different textures to add depth and visual interest. Combine smooth plastic ornaments with fuzzy faux cobwebs, rough natural elements (like painted gourds), and metallic tinsel.
- Strategic Placement: Don’t just randomly sprinkle ornaments. Think about where you want the eye to go. Place larger, more impactful ornaments lower down and towards the front. Use smaller items to fill in gaps. Let some ornaments hang lower than others to create a sense of movement and asymmetry. Bats flying upwards, spiders descending – give them a narrative!
- The “Wow” Factor: Consider a focal point ornament at the very top, like a large glittered skull or a spooky ghost topper.
- Beyond the Tree: Don’t forget the area around the base. Drape more cobwebs, place a few strategically placed pumpkins or gourds, or even add a spooky welcome mat.
Remember, a good display is about balance and visual appeal. Step back regularly to assess how it looks from different angles.
Keeping it Tidy After Week One
The magic of Halloween lasts for weeks, so keeping your tree looking its best is important.
- Daily Check-ins: A quick scan each day can catch any ornaments that have shifted or fallen. Simply re-hang them.
- Weather Watch: If you experience strong winds or heavy rain, some lighter ornaments might get dislodged. Secure them with a bit of extra wire or craft glue if needed. For extreme weather, you might consider bringing lighter, more delicate ornaments inside temporarily.
- Cobweb Control: Faux cobwebs can get a bit messy. Gently brush them back into place or replace sections that have become too tattered.
- The Leaf Factor: If your tree is outdoors, fallen leaves can accumulate. A quick sweep around the base will keep things looking neat.
A little bit of attention each week will ensure your spooky creation remains a delightful spectacle.
Common Mistakes That Make This Project Fail
Even the best intentions can lead to a Halloween tree that misses the mark. Here are a few pitfalls to avoid:
- Overcrowding: While more is often more with Halloween decor, a tree that is too densely packed with ornaments can look cluttered and lose its impact. Aim for a balance where each ornament can be appreciated.
- Lack of a Focal Point: Without a clear point of interest, your tree can feel chaotic. Ensure there’s something that draws the eye, whether it’s a large topper or a cluster of striking ornaments.
- Inconsistent Theme/Colour: Mixing too many unrelated themes or colours can make the tree look disjointed. Stick to your chosen vibe and colour palette for a cohesive look.
- Ignoring Stability: This is crucial, especially if you have children or pets around, or if you live in a windy area. Ensure your tree and its ornaments are securely fastened. A toppled tree is more scary for the wrong reasons!
- Forgetting the Scale: Using ornaments that are too large or too small for your tree can throw off the visual balance. Ensure your ornaments are proportionate to the tree’s size.
- Not Stepping Back to Assess: You’ll miss critical issues if you only look at your tree from one angle. Regularly step back, walk around it, and view it from different vantage points.
By following these tips and avoiding these common mistakes, you’ll have a DIY Halloween Tree that’s not only easy and budget-friendly but also spooktacularly stylish and enduring. Happy decorating!
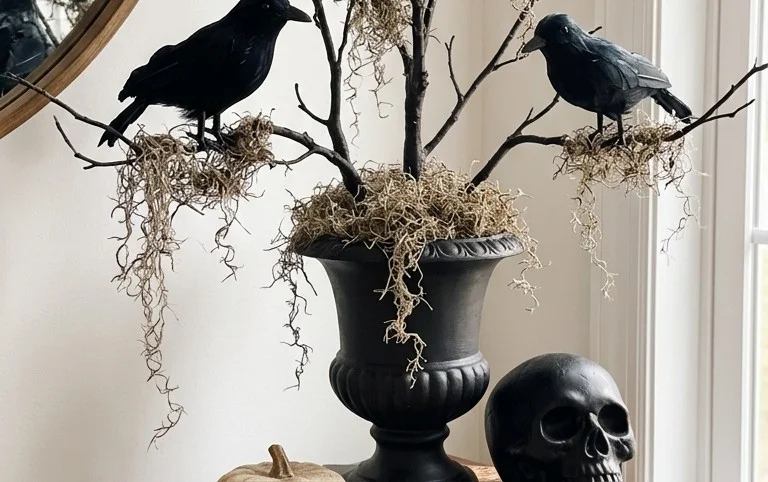
Conclusion
Adding a touch of Halloween magic doesn’t have to be complicated or expensive. This DIY Halloween tree porch decor proves that even small touches can make a big difference, transforming your entryway into a festive and welcoming space that you’ll love coming home to each day. Imagine the delight of trick-or-treaters and neighbors alike!
Ready to get started? Your smallest first step today could be simply gathering a few fallen branches or even a bare branch from a local park. For a different vibe or room, consider a spooky garland for your mantelpiece or a collection of painted mini pumpkins for a bookshelf. These budget-friendly ideas are just the beginning.
We invite you to explore more easy, budget-friendly, and spooky DIY Halloween decor ideas to continue creating a memorable season!
