Easy Crochet Pumpkin Pattern: Beginner Decor Ideas
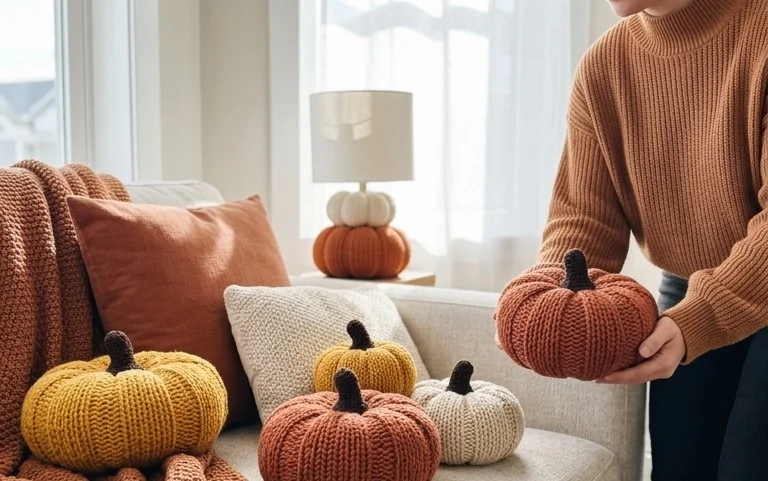
Quick and easy crochet pumpkin pattern for beginners – isn’t it time we banished those dusty corners and empty shelves? Do you ever look around your home and feel like it’s just missing that *something* cozy and welcoming, especially as the seasons change? I totally get it! Imagine a windowsill adorned with plump, cheerful crochet pumpkins, or a mantelpiece sprinkled with these delightful little creations. They add instant warmth and personality to any space. And the best part? This project is incredibly beginner-friendly, using just basic stitches and requiring minimal yarn. You can whip up a whole bunch in under an hour, for just a few dollars! In this article, I’ll guide you step-by-step, showing you exactly how to create these adorable pumpkins, even if you’ve never picked up a crochet hook before.
Cozy Up Your Home: A Quick & Easy Crochet Pumpkin Pattern for Beginners
As the leaves begin to turn and a crispness fills the air, there’s nothing quite like the cozy charm of a hand-crafted pumpkin to welcome autumn into your home. For anyone who’s ever admired those adorable crocheted gourds but thought it was too complicated, I’ve got fantastic news! This beginner-friendly pattern is designed to be incredibly simple and quick, perfect for even the most novice crocheter. In just a few hours, you can create a delightful decorative pumpkin that will add a touch of handmade warmth to any space. Let’s dive in!
Gathering Your Supplies: What You’ll Need and How Much it Costs
The beauty of this project lies in its simplicity, and that extends to the materials. You won’t need a vast collection of fancy tools.
* **Yarn:** For one medium-sized pumpkin (about 6-8 inches in diameter), you’ll need approximately 50-70 yards of chunky or bulky weight yarn in your chosen pumpkin color. Think classic orange, but don’t be afraid to experiment with creamy whites, muted greens, or even a deep burgundy!
* *Rough Cost:* A skein of bulky acrylic yarn typically costs between $4 and $8, depending on the brand and where you purchase it. So, you’re looking at roughly $5-$10 for yarn per pumpkin.
* **Crochet Hook:** A hook that complements your yarn is essential. For bulky weight yarn, a 6mm (US J/10) or 7mm (US L/11) crochet hook is usually a good starting point. Check the yarn label for recommended hook sizes.
* *Rough Cost:* Basic crochet hooks are very affordable, usually ranging from $2 to $5.
* **Stuffing:** You’ll need about one bag of polyester fiberfill stuffing. This is the same stuffing used for pillows and plush toys.
* *Rough Cost:* A small bag of stuffing is typically around $3 to $6.
* **Scissors:** A sharp pair of scissors for cutting yarn.
* *Rough Cost:* You likely already have these, but if not, a basic pair is about $3-$5.
* **Yarn Needle:** For weaving in your ends and sewing the opening closed.
* *Rough Cost:* A pack of yarn needles is usually $2-$4.
* **Optional: Twig or rolled-up brown yarn for the stem.**
* *Rough Cost:* A small twig is free! If you opt for brown yarn, you’ll need a few extra yards of a similar weight, costing less than a dollar if you’re already buying yarn.
**Total Estimated Cost Per Pumpkin:** Around $15-$25, but much less if you already have some supplies on hand, making this an incredibly budget-friendly decor option!
Planning Your Pumpkin: A Little Prep Goes a Long Way
Before you cast on, take a moment to think about where your pumpkin will live and how big you want it to be.
* **Size Matters:** This pattern is for a spherical pumpkin. The final size will depend on your tension (how tightly or loosely you crochet) and the specific yarn and hook combination you use. A good starting point is to aim for a circumference of about 18-24 inches for a medium-sized pumpkin.
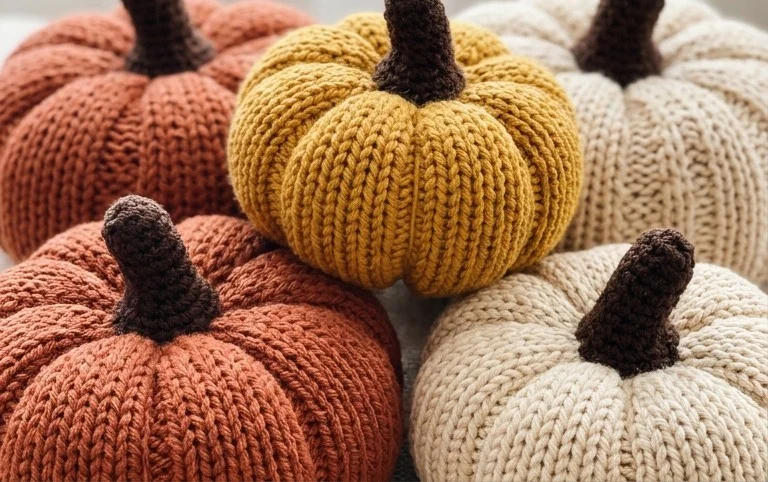
* **Color Palette:** Consider your existing decor. Are you going for a traditional autumnal look with oranges and yellows, or a more modern, neutral palette with creams and greys? Having a cohesive color scheme will make your crocheted pumpkins look intentional and stylish.
* **Placement:** Where will these pumpkins live? On a mantelpiece, a bookshelf, a coffee table, or perhaps a tiered tray? This will influence the size and number of pumpkins you make. For a mantel, a few larger pumpkins might be ideal. For a small shelf, a cluster of smaller ones could be perfect.
Your Step-by-Step Crochet Pumpkin Journey
This pattern uses basic crochet stitches: single crochet (sc) and increases (2 sc in the same stitch). We’ll be working in the round, starting with a magic circle. Don’t worry if you haven’t done a magic circle before; there are plenty of great video tutorials online that can show you exactly how to create this tight, neat starting point.
**Let’s Get Crocheting!**
1. **Start with a Magic Circle:** This creates a tight center that won’t have a hole.
2. **Round 1:** Crochet 6 single crochet (sc) stitches into the magic circle. Pull the tail of the yarn to close the circle tightly. (6 stitches)
3. **Round 2:** Crochet 2 sc in each stitch around. (12 stitches)
4. **Round 3:** *Crochet 1 sc, then crochet 2 sc in the next stitch.* Repeat from * to * around. (18 stitches)
5. **Round 4:** *Crochet 1 sc in the next 2 stitches, then crochet 2 sc in the next stitch.* Repeat from * to * around. (24 stitches)
6. **Round 5:** *Crochet 1 sc in the next 3 stitches, then crochet 2 sc in the next stitch.* Repeat from * to * around. (30 stitches)
7. **Round 6:** *Crochet 1 sc in the next 4 stitches, then crochet 2 sc in the next stitch.* Repeat from * to * around. (36 stitches)
8. **Rounds 7-12 (or until desired size):** Crochet 1 sc in each stitch around. Do NOT increase. This is where your pumpkin starts to grow upwards. The number of rounds here will determine the height of your pumpkin. For a medium pumpkin, 6 rounds of plain sc is a good starting point. You can always add more if you want a taller, more elongated shape.
9. **Round 13 (or your first decrease round):** *Crochet 1 sc in the next 4 stitches, then crochet 2 sc together (sc2tog).* Repeat from * to * around. (30 stitches)
* *How to sc2tog:* Insert your hook into the next stitch, yarn over, pull up a loop (you now have 2 loops on your hook). Insert your hook into the *next* stitch, yarn over, pull up a loop (you now have 3 loops on your hook). Yarn over and pull through all 3 loops on your hook.
10. **Round 14:** *Crochet 1 sc in the next 3 stitches, then crochet 2 sc together.* Repeat from * to * around. (24 stitches)
11. **Round 15:** *Crochet 1 sc in the next 2 stitches, then crochet 2 sc together.* Repeat from * to * around. (18 stitches)
12. **Round 16:** *Crochet 1 sc in the next stitch, then crochet 2 sc together.* Repeat from * to * around. (12 stitches)
13. **Finishing:** Fasten off your yarn, leaving a long tail (about 12 inches). Thread this tail onto your yarn needle.
The “Stuffing” and Closing Secret
Now for the fun part – bringing your pumpkin to life!
1. **Stuffing:** Before you close the opening, begin to loosely stuff your pumpkin. Don’t overstuff it at this stage, as it can make it difficult to close neatly. You want it to have a nice, plump shape without being rock hard.
2. **Closing the Opening:** Thread your yarn needle through the remaining 12 stitches, going in and out around the edge of the opening. Once you’ve gone through all the stitches, pull the yarn tail firmly. This will gather the opening and close it completely.
3. **Securing and Weaving:** Thread your needle back through the center of the closed opening a few times to secure the yarn. Then, weave the yarn tail through the inside of the pumpkin and out a different spot. Trim any excess yarn.
4. **Adding the Stem (Optional):**
* **Twig:** Find a small, sturdy twig about 2-3 inches long. Insert one end into the top center of your pumpkin. You can use a dab of fabric glue if you’re worried about it falling out, but often a snug fit is enough.
* **Yarn Stem:** If you don’t have a twig, take a small piece of brown yarn (about 4-6 inches). Fold it in half. Insert your crochet hook from the underside of the pumpkin up through the center of the top. Hook the folded yarn and pull it through to create a loop. With your hook still in the loop, grab the two loose ends of the yarn and pull them through the loop to create a slip knot, forming a small, sturdy stem. Trim to your desired length.
Styling Your Crochet Pumpkins: Making Them Shine
This is where your creativity truly takes flight!
* **Color Coordination:**
* **Classic Autumn:** Mix shades of orange, rust, and even a deep yellow for a traditional feel.
* **Modern Neutrals:** Think creamy ivory, soft grey, and muted sage green. These will blend seamlessly into most decor styles.
* **Unexpected Hues:** Don’t shy away from deep blues, plums, or even a soft pastel pink for a whimsical touch.
* **Texture Play:** Combine your crocheted pumpkins with other textures. Drape a chunky knit throw nearby, add some natural elements like pinecones or faux fall leaves, or place them alongside wooden decorative items.
* **Arrangement Ideas:**
* **Mantel Magic:** Cluster them in varying sizes at the base of your fireplace or along your mantelpiece.
* **Tiered Tray Trio:** A group of three in different sizes makes a charming statement on a tiered tray.
* **Entryway Welcome:** Place a few on a console table in your entryway to greet guests.
* **Centerpiece Charm:** A small cluster can make a lovely, informal centerpiece for your dining table.
* **Accessorizing:** You can add extra flair by tying a small length of jute twine or ribbon around the stem, or even adding a small felt leaf.
Keeping Your Crochet Pumpkins Tidy After Week One
The beauty of crochet is its durability! Your pumpkins are made to last.
* **Dusting:** A gentle dusting with a soft cloth or a microfiber duster is usually all that’s needed. For a deeper clean, you can use a lint roller to pick up any stray fuzz or pet hair.
* **Reshaping:** If your pumpkin gets a little squished from use, gently reshape it with your hands to restore its plumpness.
* **Storage:** When the season is over, store your pumpkins in a breathable fabric bag or a box to protect them from dust and moisture. Avoid plastic bags, which can trap humidity.
Mistakes That Can Make This Project Fail (And How to Avoid Them!)
Even with a simple pattern, a few common pitfalls can occur.
* **Tension Issues:** If your stitches are too tight, your pumpkin might not form a nice round shape, or it might be difficult to stuff. If they’re too loose, it might look baggy and shapeless. The best advice is to practice with your chosen yarn and hook on a small swatch before you start. Aim for consistent stitch size.
* **Not Enough Stuffing:** A sparsely stuffed pumpkin will look deflated and sad. Don’t be afraid to add more stuffing until it has a firm, round shape.
* **Overstuffing:** Conversely, overstuffing can make the stitches stretch too much, revealing the stuffing underneath, and can make it difficult to close the top neatly. Stuff until it’s firm but not rigid.
* **Not Closing the Top Properly:** If you don’t pull the final yarn tail tightly enough, or if you don’t weave it in securely, the opening might gape open, or the stuffing could start to peek out. Take your time with this final step!
* **Ignoring Gauge:** While gauge isn’t critical for this specific project, if you’re aiming for a particular size, making a small test swatch first will give you a good idea of how your chosen yarn and hook will work up.
This quick and easy crochet pumpkin pattern is a delightful way to inject some handmade charm into your fall decor. It’s a rewarding project that even complete beginners can tackle with confidence. So grab your hook and yarn, and let’s get stitching! Happy crocheting!
Conclusion
There’s a special kind of joy that comes from creating something beautiful with your own hands, and these quick and easy crochet pumpkins are no exception! Imagine the subtle warmth and cozy charm these little creations bring to your home, transforming everyday spaces into welcoming havens. The satisfaction of knowing you made them yourself is truly a delightful difference you’ll appreciate each day.
Ready to start? Your smallest possible first step is to gather your yarn and hook. You can create a cluster of small pumpkins for a windowsill or one larger, statement pumpkin for a mantelpiece.
Variations to Explore:
For a touch of farmhouse chic, try using natural, un-dyed cotton yarn. If you’re on a tighter budget, grab scraps of colorful yarn you already have to make a vibrant, playful collection.
We hope this quick and easy crochet pumpkin pattern inspires you. Keep exploring our ideas for more simple, delightful DIY home decor projects!